
Raised platform comparison
HDB Raised Platform Flooring: Vinyl vs Tiles Singapore Guide
Compare the platform base, step edges, daily comfort and complete renovation scope before choosing a finish.
Suitability depends on the structure, finished height, selected product, edge detail and how the platform will be used.
Starting point
Define what the raised platform must do
An HDB raised platform may form a bed zone, window seating area, dining zone or level change between spaces. Record the complete length, width and height, the number of steps and the furniture that will sit on it. A finish that looks suitable in one photograph may behave differently when a bed, storage hatch, dining table or rolling chair is added.
Confirm whether the platform already exists or will be newly built. Identify the base material, structural support, moisture condition and any hollow, flexible or uneven areas. The flooring installer can assess the surface finish, but platform construction and loading may require coordination with the carpenter, renovation contractor or other relevant professional.
Platform base
Check stability before selecting vinyl or tiles
Vinyl needs a stable, dry and sufficiently flat base compatible with the selected system. Flexible panels, visible joints or screw heads can affect the finished surface if they are not prepared correctly. Ask whether plywood, cement board, screed or another layer is proposed, and who is responsible for accepting the base before flooring begins.
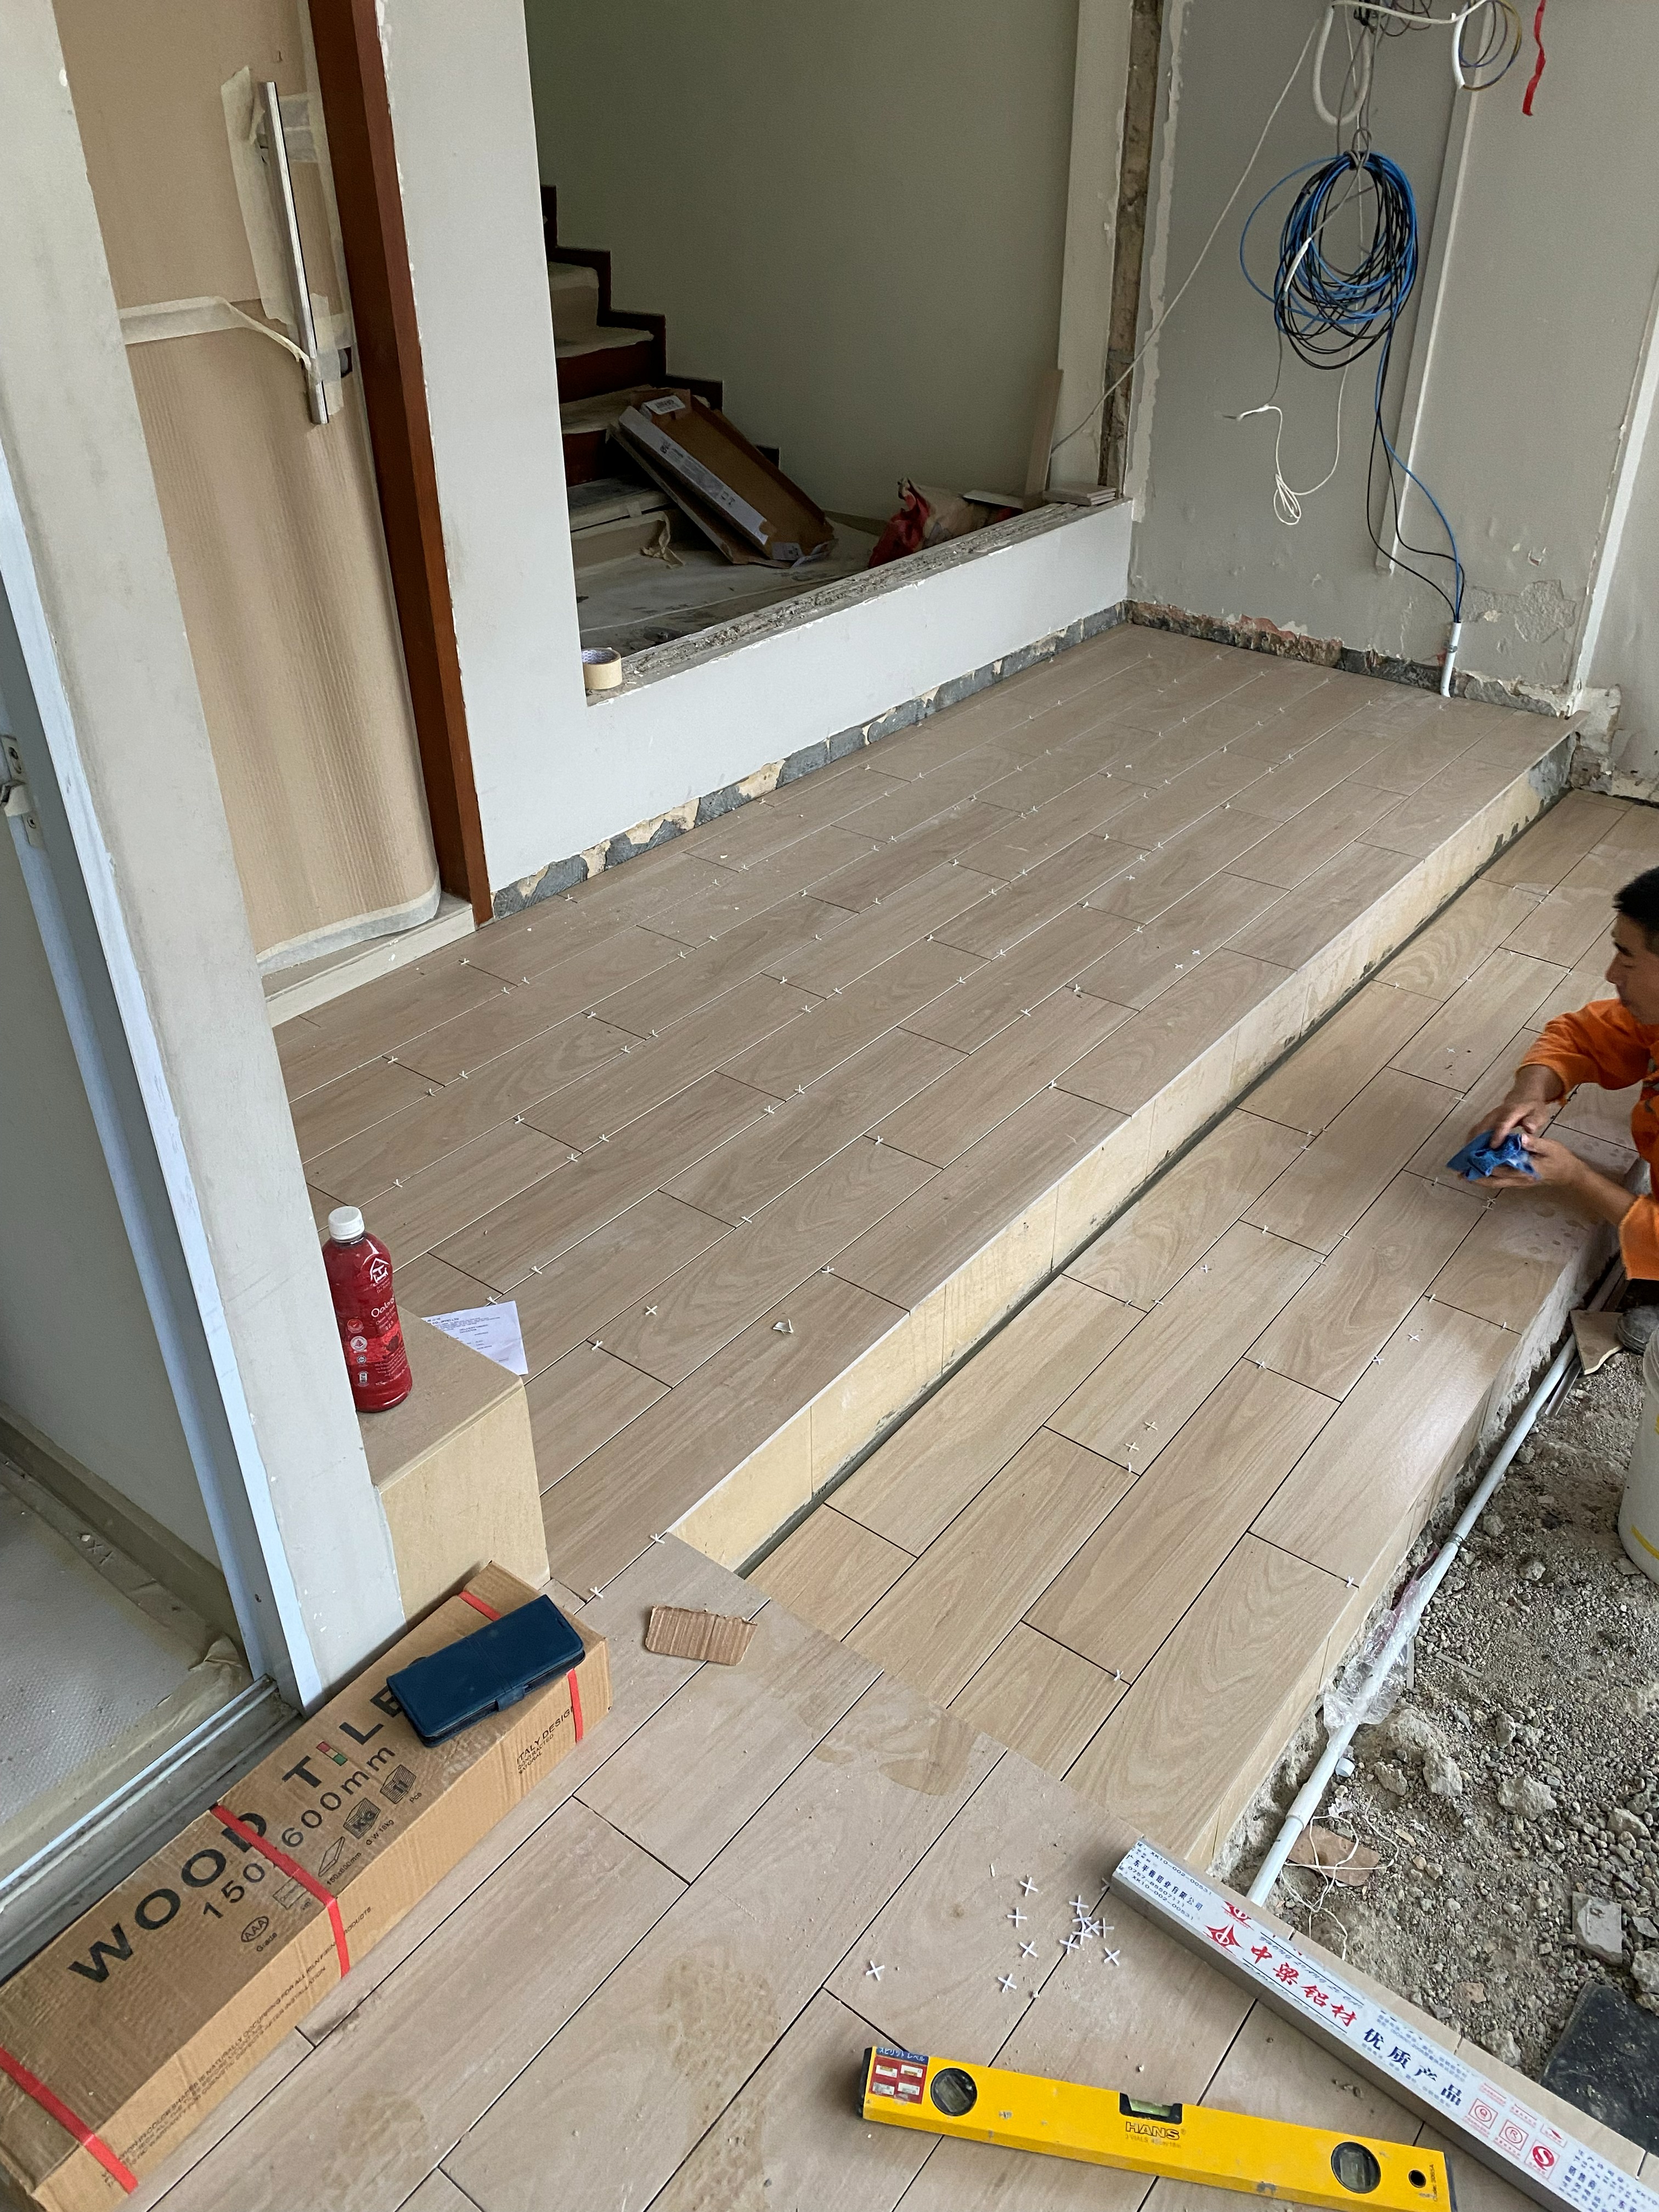
Tiles also require a suitable base and installation method. Movement below a tiled surface can contribute to cracked grout or tiles. The photographed platform uses wet-work setting and spacers, but that method should not be copied without assessing the actual structure. Request a written description of preparation, adhesive, joints and curing requirements.
Step edges
Design the platform edge before laying the field
The front edge is both a visual feature and a frequent contact point. Vinyl platforms usually need a compatible nosing, trim or wrapped detail that protects the edge and allows the selected floor system to move as intended. Confirm profile colour, projection, corner joints and how the riser meets the main floor.
Tiled platforms may use matching edge tiles, mitred details or a separate nosing profile. Sharp, uneven or poorly supported edges are not acceptable. Review the detail from the approach direction and under evening lighting. Where a level change is unexpected, contrast, lighting or another clear visual cue may be important for safe everyday use.
Height and access
Measure the complete finished level
Flooring adds thickness to the platform top, riser and adjacent floor. Calculate the completed level after all substrate, adhesive, levelling and finish layers are included. Check doors, wardrobes, window ledges, power points and any storage hatch. A small height change can affect whether a drawer opens or a mattress platform remains at the intended level.
Keep step dimensions consistent and verify headroom where the platform sits below a beam, window or loft element. If older family members, children or mobility needs are involved, discuss access before construction. A platform may not suit every household or circulation route, regardless of finish material.
Comfort and use
Compare how each surface feels in the room
Vinyl often feels warmer and less hard underfoot than tile, which may suit a bedroom platform or floor-seating zone. Product construction, permitted underlay, substrate and installation influence the result. Heavy furniture, sharp legs, heat and dragging can damage a surface, so add suitable protectors and follow the selected product's care instructions.
Tiles provide a firm surface and may feel cool in a naturally ventilated area. Grout lines, texture and sheen affect cleaning and slip feel. A hard tiled step can also make impact more severe. Consider how people will enter, sit, sleep, clean and move furniture on the platform instead of selecting by colour alone.
Maintenance
Plan cleaning, repairs and access panels
Vinyl should normally be cleaned without excessive water or incompatible chemicals. Ask how damaged planks near a step edge could be replaced once furniture and nosing are installed. Keep spare material from the same batch when practical. If the platform includes storage access, the flooring and trim should not prevent the hatch from opening or being serviced.
Tiles resist many everyday marks, but grout can collect dirt and a chipped edge or discontinued tile can complicate repairs. Access panels need planned joints and handles rather than improvised cuts after installation. Neither finish should conceal signs of moisture, movement or damage in the platform structure.
Appearance
Coordinate the top, riser and surrounding floor
Decide whether the platform should blend with the main floor or read as a separate zone. Wood-look vinyl can continue a plank direction across the top, while a contrasting nosing makes the edge more visible. Tiles offer many sizes and patterns, but grout lines and cuts should align thoughtfully with the platform shape.
Review physical samples on the top and vertical riser under daylight and room lighting. Ask for a setting-out drawing where cuts, nosing and pattern direction are important. The floor, skirting, built-ins and furniture should be considered together so the platform does not look like an isolated material sample.
Cost and sequence
Compare complete quotations and installation timing
A complete comparison includes platform preparation, levelling, top and riser area, wastage, nosing, skirting, trims, access hatches, furniture movement, protection and disposal. Vinyl and tile quotations may measure edges and steps differently, so compare the same dimensioned scope rather than only a square-foot material rate.
Coordinate platform construction, electrical work, painting, flooring, carpentry and furniture delivery. Tiles can involve wet work and curing; vinyl should not be installed before the base and surrounding work are ready. Confirm who protects the finished edge and who returns for final trims. Allow time for base repair and adjustment instead of scheduling move-in immediately after the first installation day.
Suitability
Know when a platform finish may not fit
Vinyl may not be suitable where the base is damp, unstable, excessively uneven or incompatible with the system. Tiles may not suit a base with unresolved movement or a project seeking minimal wet work and a softer underfoot feel. Either option can fail when edge, base and finished height are treated as afterthoughts.
A raised platform itself may be unsuitable where it narrows circulation, creates an unexpected trip point, blocks doors or conflicts with household mobility. Resolve the layout first, then compare finishes. Do not rely on flooring to correct a platform that has not been properly designed and constructed.
FAQ and quote checklist
Send enough information for a platform assessment
Can vinyl go on a raised platform? Possibly, when the base and edge are suitable for the selected system. Are tiles more durable? Performance depends on the tile, base, installation, grout and household use, not the surface label alone. How long will work take? Timing depends on construction, preparation, area, edges, access and curing requirements.
Send the HDB floor plan, platform length, width and height, photos of the top, riser and surrounding floor, base construction if known, furniture plan, storage-hatch details, preferred finish and renovation schedule. State whether the home is vacant or occupied. WhatsApp +65 8742 6767 for a project-specific vinyl flooring quotation and platform assessment.