
Can vinyl continue into an open kitchen?
It may where the product and site are suitable. Moisture, substrate, levels and edge details still need assessment.
Open kitchen planning guide
Plan the kitchen, dining area and connecting walkway as one floor without overlooking water, cabinets or transitions.
Continuous flooring can create visual flow, but the substrate and renovation sequence still need room-by-room checks.
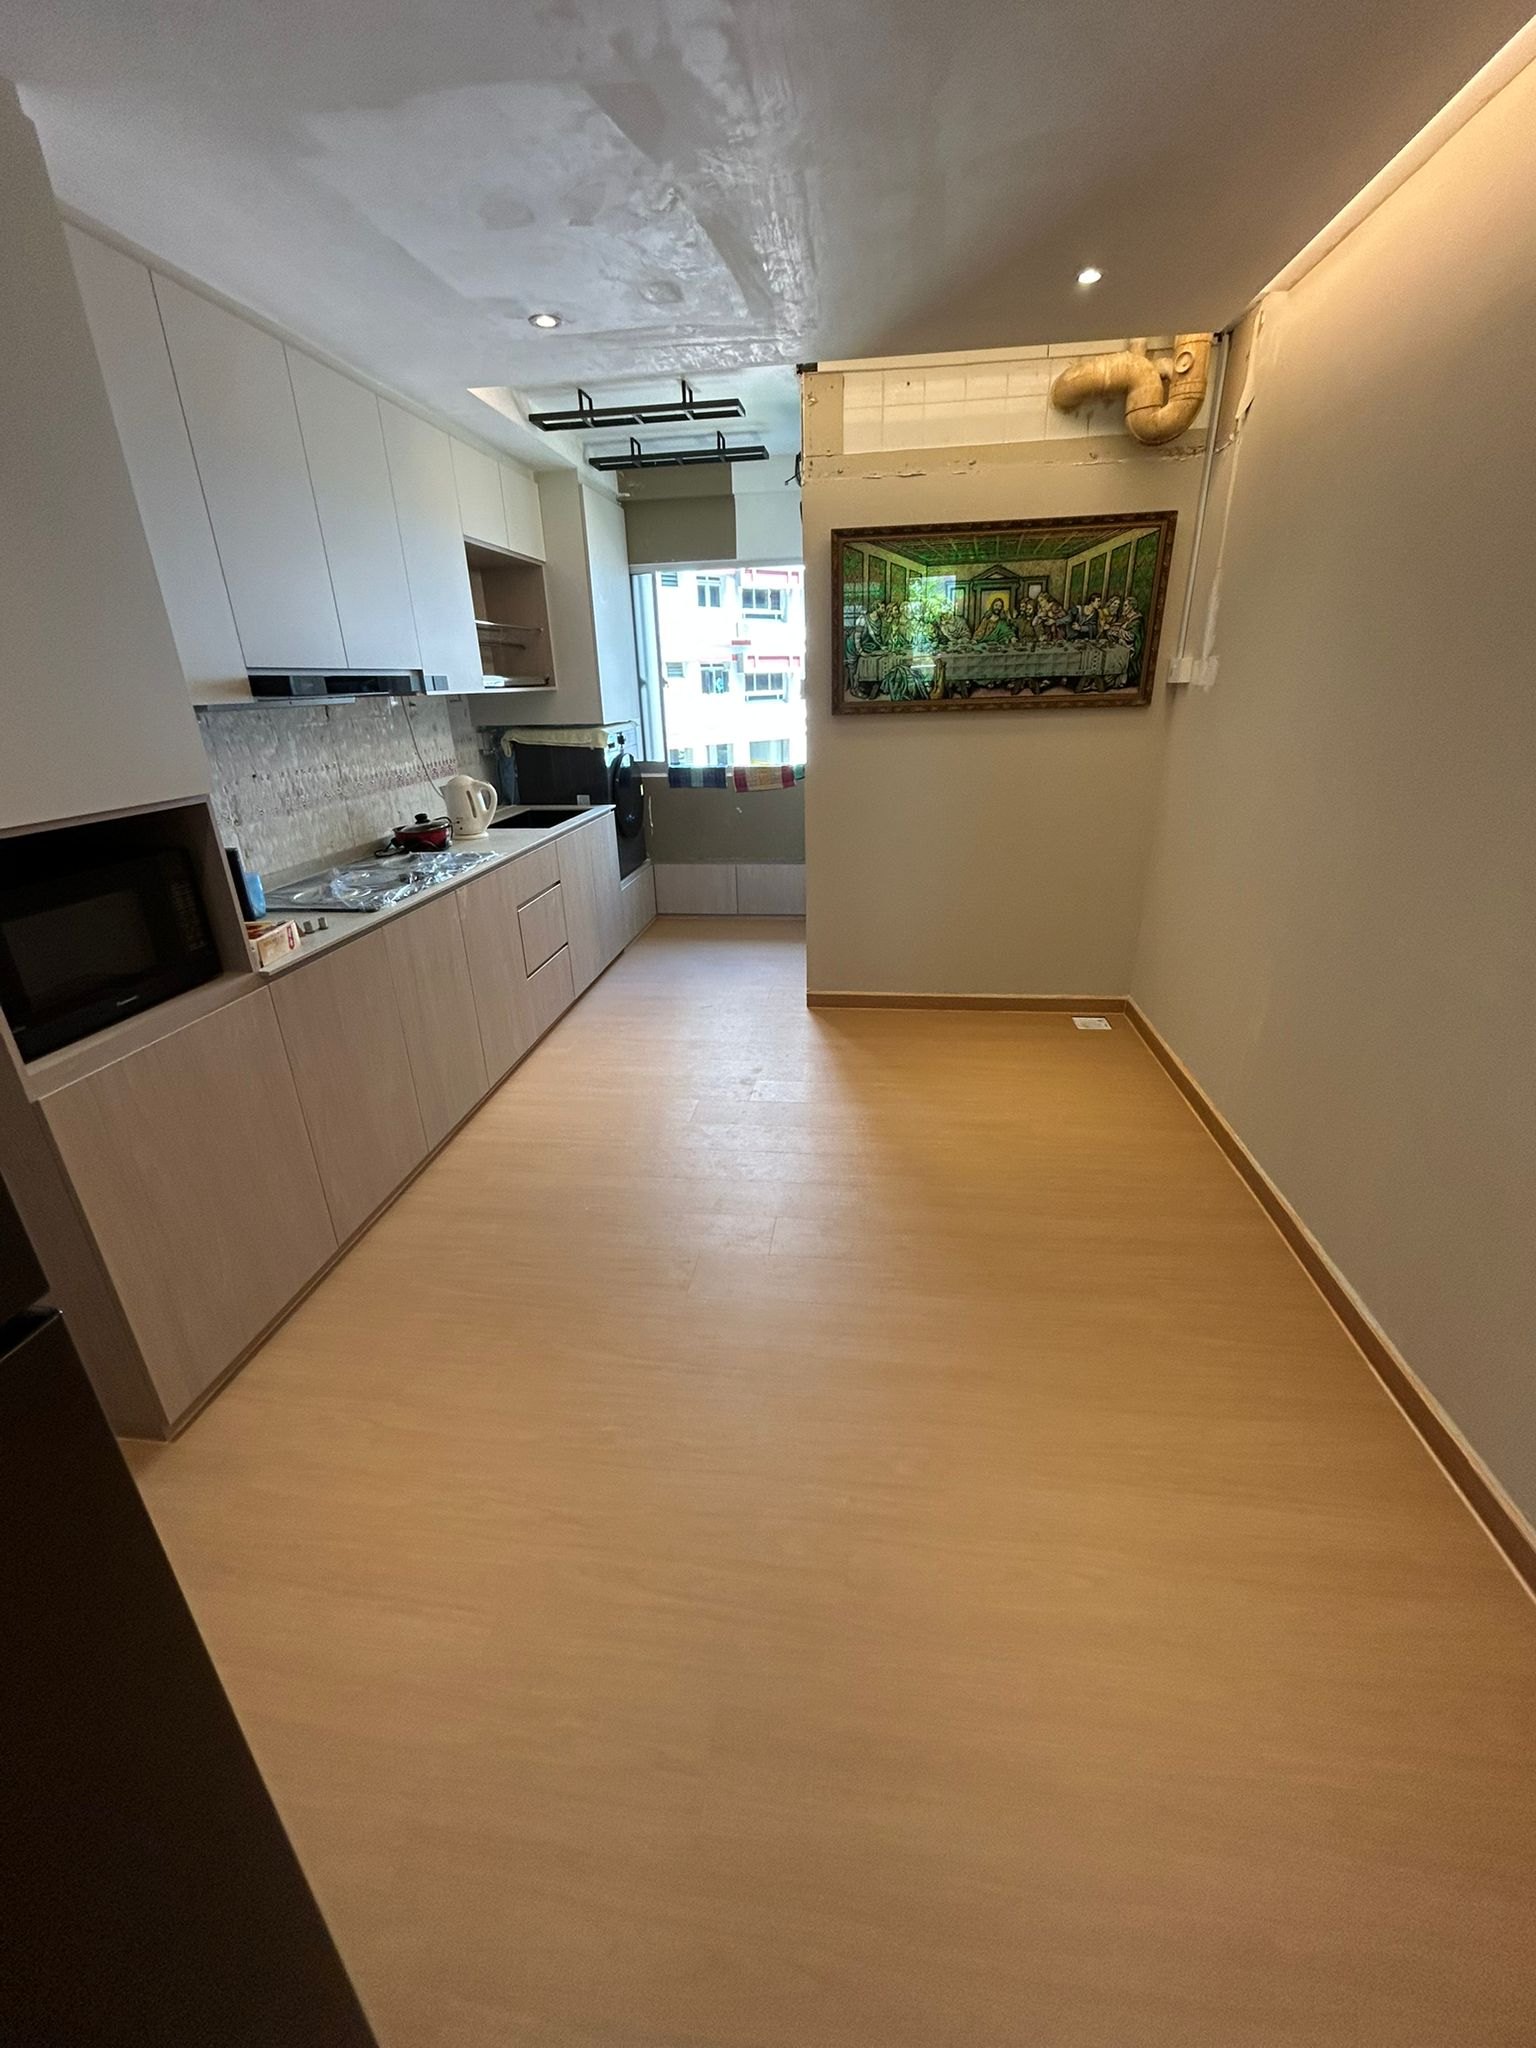
Whole zone
An open-concept HDB kitchen may connect directly to the dining area, living room or corridor. Mark every included space and decide where vinyl meets retained tiles, bathroom thresholds, service-yard flooring or the entrance. A continuous finish can create visual flow, but preparation and level differences must be coordinated across the larger area.
Kitchen islands, cabinet bases and concealed corners affect measured area and edge details. Confirm whether the service yard remains separate and whether a hacked wall leaves a strip of different substrate. Wide photos from each end help the flooring team understand the route.
Suitability
An open kitchen still has sinks, appliances and possible leaks. Product water resistance does not make the installation waterproof. Water can reach joints, perimeter gaps, cabinet bases or the substrate. Discuss the room, installation method and manufacturer requirements rather than assuming every vinyl product suits every kitchen.
Repair active leaks and investigate moisture before installation. Keep wet bathroom and service-yard zones separated, wipe spills promptly and avoid standing water. Describe frequent heavy cooking or washing so product and maintenance expectations can be discussed before purchase.
Existing floor
Overlay may be possible when existing tiles are stable, sufficiently level, dry and suitable for the selected flooring system. Hollow, loose or cracked tiles need assessment. Deep grout lines, patched wall footprints and changes between kitchen and dining substrates may require preparation. Covering defects without addressing them can affect the finished surface or create movement later.
In a BTO, verify the actual provided floor and any owner-supplied screed. In a resale HDB, photograph previous renovation edges and areas beneath removable cabinets or appliances when accessible. A site inspection may be needed before the final quotation. Read the cement screed and levelling guide for preparation questions.
Cabinet sequence
Whether flooring runs beneath cabinets or finishes neatly at cabinet bases depends on the flooring system, cabinet construction and agreed renovation sequence. Do not let the flooring and carpentry teams make separate assumptions. Share the kitchen elevation and floor specification with both parties before cabinet fabrication and record who is responsible for edge gaps, plinths and protection.
An island or peninsula needs the same coordination, including its position, support and any electrical route. Heavy fixed cabinetry should follow the requirements of the selected floor. If cabinets are installed first, confirm how visible edges will be finished. If flooring is installed first, agree how it will be protected from tools, deliveries and later trade work. Use the renovation sequence guide.
Appliances
List the fridge, freestanding cooker, dishwasher, washing machine and other movable appliances. Check whether flooring continues into their niches and whether they can be removed later without damaging an edge or hitting a level change. Appliance weight, wheels and feet should be considered under the flooring manufacturer's guidance. Protect the finished surface during delivery instead of dragging equipment into place.
Confirm door and drawer clearance after the finished floor height changes. A fridge door beside a wall or tall cabinet may already have limited opening space. Service-yard doors, cabinet plinths and appliance panels can also be affected by a higher floor. Plumbing and electrical connections must remain accessible and should not rely on the flooring installer to improvise changes.
Colour and direction
Light natural wood can brighten a narrow kitchen and connect it visually with dining furniture, while mid-tone finishes may be more forgiving in a busy household. Compare physical samples beside cabinet doors, worktops, wall paint and dining furniture under both daylight and evening lighting. Strong wood grains can compete with patterned cabinet finishes, so view more than a small catalogue square.
Plank direction can lead the eye through a long galley kitchen or across the open dining zone. The best direction also depends on room shape, doorway alignment, installation planning and wastage. Decide whether planks remain continuous into the living room or change at a clear threshold. Review the HDB plank direction guide before material ordering.
Edges and levels
Overlay raises the finished floor. Check the main door, bathroom and service-yard thresholds, balcony transitions and any retained tile. A sudden edge in an open walkway can look unfinished or create a trip concern. Agree on suitable transition profiles and colours. Skirting should also be coordinated where kitchen cabinets stop and painted walls begin.
Expansion or perimeter requirements depend on the selected flooring system and must not be covered by unsuitable finishing. Ask how edges around pipes, cabinet legs and door frames will be handled. If a wall was removed, the old floor line may need repair before the vinyl is laid. Photograph each transition for the quotation rather than assuming all edges use the same trim.
Cost
Cost depends on measured area, product, wastage, substrate preparation, levelling, trims, skirting, furniture or appliance movement, access and installation complexity. A quoted square-foot rate may not include repair to removed-wall strips or difficult transitions. Ask for preparation and finishing items to be stated separately so competing quotations cover the same work.
A continuous kitchen and dining floor may reduce some transitions but increase the total preparation area. Keep a realistic allowance for hidden defects that become visible after movable items are removed. Avoid choosing only by the lowest headline rate. Product suitability, detailed scope and site readiness matter more than a promotional number without equivalent inclusions.
Timing
Coordinate hacking, wall repair, plumbing, electrical work, painting, carpentry and appliance delivery before fixing the flooring date. Wet preparation needs adequate time under the relevant system, and the site should be clean and ready. Flooring installed too early may need extensive protection while cabinets and worktops are carried through the open area.
Ask when rooms must be clear, how long preparation and installation are expected to take, and when normal use can resume. HDB access, lift use and delivery routes should be planned. The actual schedule depends on area and condition, so do not promise a move-in date based only on a generic installation duration.
Quote checklist
Send the floor plan, kitchen elevation, wide photos of kitchen and dining areas, close-ups of existing tiles or screed, removed-wall strips, thresholds, service-yard entrance and cabinet bases. Include appliance positions, known moisture history, areas to retain, preferred colour and the renovation schedule.
Glee Flooring can then discuss overlay suitability, preparation, edges and installation sequence. The final quotation should identify the product, measured scope, preparation, skirting, trims and exclusions. WhatsApp +65 8742 6767 with the plan and photos for a project-specific quotation.
FAQ
It may where the product and site are suitable. Moisture, substrate, levels and edge details still need assessment.
The sequence depends on the flooring system and cabinet design. Both installers should confirm the detail in advance.
Send the floor plan, kitchen layout, floor and threshold photos, appliance positions and renovation timing.
Send the floor plan, cabinet layout and current floor photos for a practical quote.